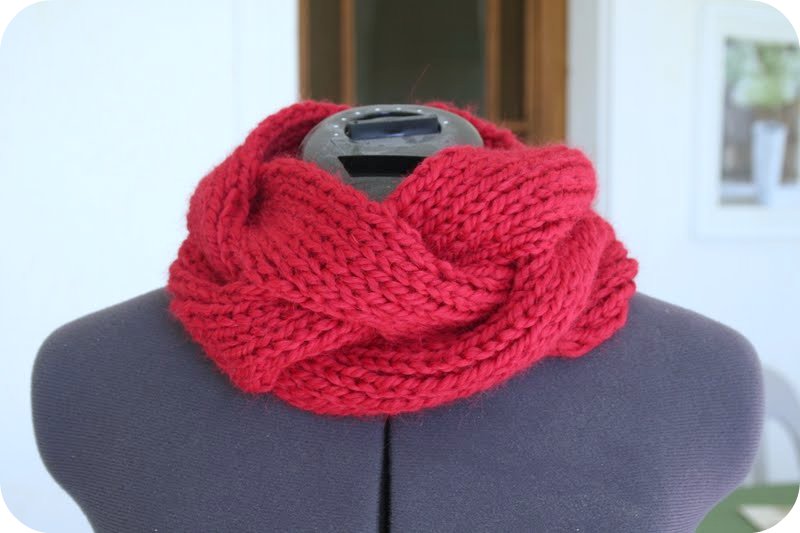
This pattern is more of a guide to make a reversible, seamless braided cowl. It can be adapted in several different ways and with different yarn. If you put the effort forth to hand-knitting an item from this guide and hope to sell it, by all means sell it. Please link this pattern to your listing if you do choose to sell from it. If you are feeling especially nice, charge more for yours on Etsy than I will 😉
You will need:
Approximately 110 yds of chunky yarn, preferably a wool or wool mix. Wool is a great insulator in cold weather and resists moisture so it will keep you dry as well. Not only that but it’s a treat to knit. I used Plymouth Yarn Baby Alpaca Grande in red. The yardage worked out perfectly with 2 or 3 yards to spare.
A foot or 2 of yarn of any size, color, or weight to be used in the CO. This will not be in the end result.
Size US 13 needles. Pull out the big ones that you hide under your bed in case someone breaks into your house.
Large crochet hook to use as a stitch holder when doing cables
1 yarn/darning needle
4 chunky double pointed knitting needles. Size US 13 would be ideal, but I use US size 10 and have survived. You can substitute any chunky size, or in a pinch use markers or thick pens. You will not be knitting with these. They will merely be to hold stitches while you graft. Don’t be scared if you’ve never done this, I’ll walk you through it.
Kmart coupons may apply for some knitting supplies, so always look online before you shop.
***Modifications***
This pattern is easily modified for different yarns or lengths. If you would like to double the length of this cowl so that it can wrap around your neck twice in a fluffy vogue type way, simply double the yardage required and work the cable twice as many times. If it were me I’d do twice as many times +1. The cable pattern divides the stitches into thirds and requires even numbers.
For instance, this standard pattern will CO 36 stitches which will divide into 3 sections of 12 to make the braid. You can easily make it thinner and CO 30 and divide each section into 10s, etc. I recommend not making the sections any larger than 12 stitches because it get’s awfully difficult to cable numbers that high. Your hands will begin to ache.
***Terms***
K = Knit
P= Purl
C24F in rib= place the first 12 stitches onto the crochet hook and hold in front of the work. Work the next 12 stitches in 1×1 rib, then work the stitches off of the crochet hook in 1×1 rib.
C24B in rib= place the first 12 stitches onto the crochet hook and hold in back of the work. Work the next 12 stitches in 1×1 rib, then work the stitches off of the crochet hook in 1×1 rib.
1×1 rib = (K1, P1) repeat across.
Shall we begin?
Using the provisional method of casting on, CO 36 stitches. (This YouTube video was a great help to me learning this method. It’s essential you cast on these “live” stitches.)
**(K1, P1) for 4 rows
Next row: C24F in rib and (K1, P1) until end of the row.
(K1, P1) for 8 rows
Next row: C24B in rib and (K1, P1) until end of row.
(K1, P1) for 4 rows. Repeat from ** 4 times (or desired amount)
That was easy, wasn’t it? The next part is a bit tricky, but don’t be scared. It’s just yarn. Tell yourself you’re good enough, smart enough, and gosh darn it, people like you. Think of how proud of yourself you’ll be and how smart you’ll feel wearing a seamless cowl. Take a deep breath, here we go into the grafting part. (I recommend if you have never done grafting, or even grafting 1×1 ribbing to work up a small swatch in cheap scrap yarn and practice before using your nice project. There’s only one thing trickier than doing the Kitchener stitch in rib, and that’s redoing the Kitchener stitch in rib.)
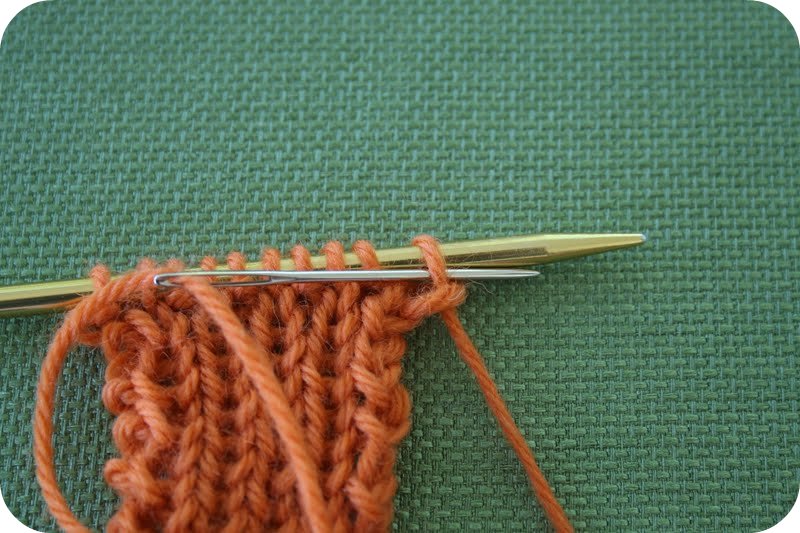
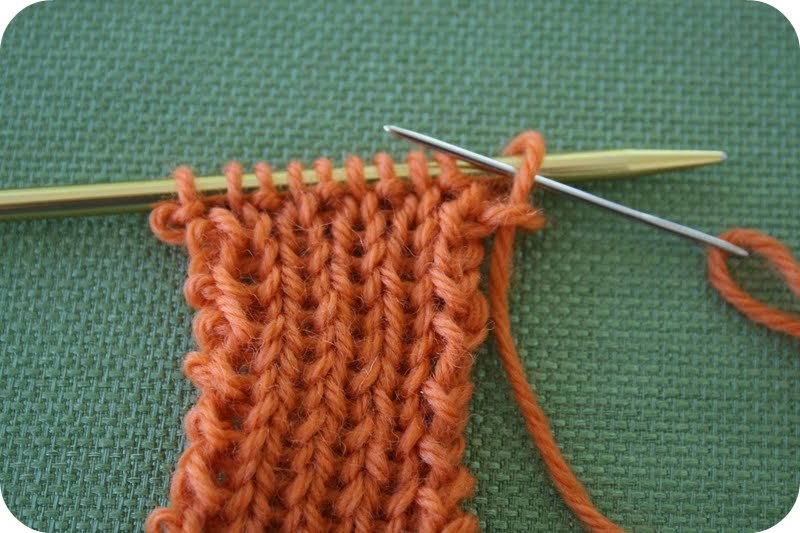
I’ll show you how to do this stitch using an orange swatch with smaller stitches so it’s easier to see.
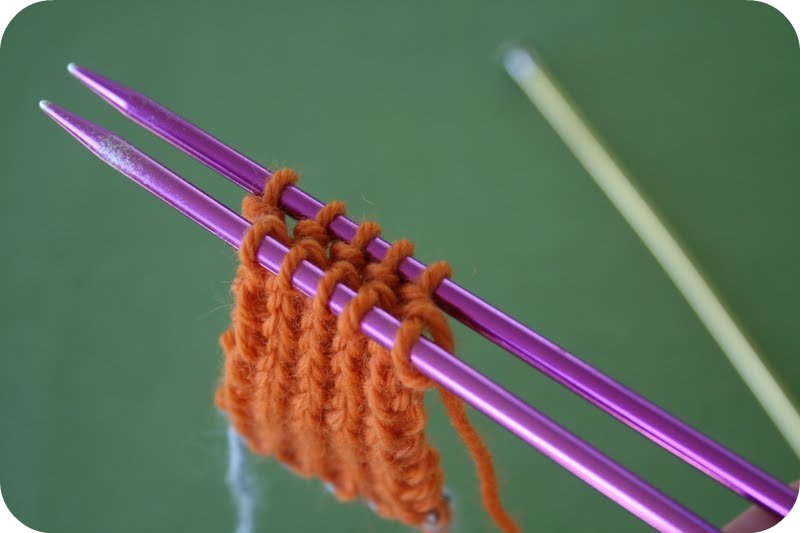
With the end you just finished with, and using 2 thick double pointed needles, divide the knit stitches onto one needle, and the purl stitches onto the other needle, like this:
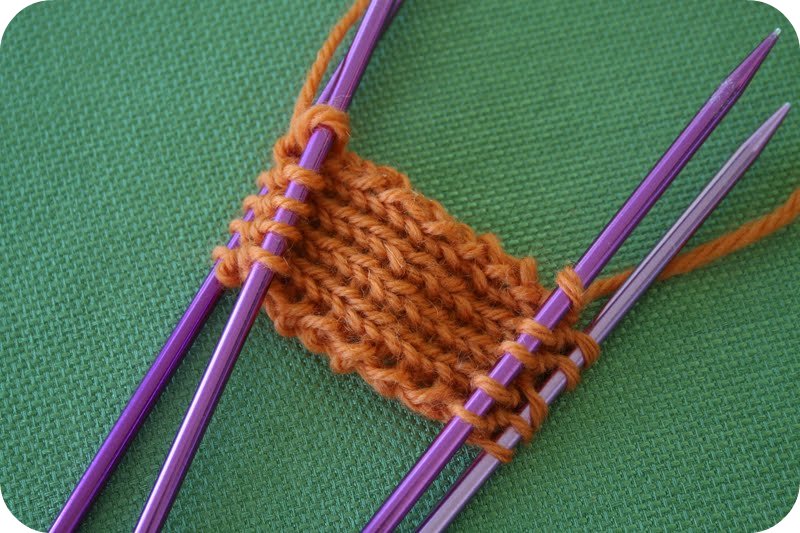
Then go back to the beginning and move the stitches off of the scrap yarn used in the provisional cast on, and onto a your size US 13 needle. Then divide the knit stitches to one double pointed needle and the purl stitches to the other double pointed needle. *Be careful to untwist, or “sort out” these stitches so that they lay correctly as if you were to knit or purl them correctly.*
Now, you’ll want to loop your work around in a circle and find where 2 sides meet up by where you’ll start. Since the Kitchener stitch is worked from right to left, I recommend starting where the yarn is at the right side. Give yourself about a generous yard of yarn to spare and cut your yarn and put on the darning needle, giving yourself a huge tail so the length you’ll be working with won’t be so long and tangly.
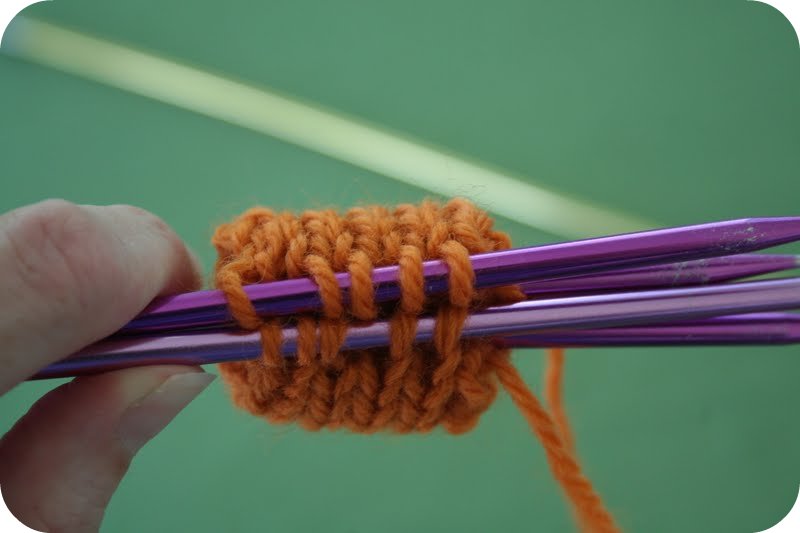
The Kitchener is worked with a front needle and back needle, but for this project I think it’s easier to refer to them as the top needle and bottom needle.. Locate the 2 needles you’ll be beginning to graft from.
Now, there’s a lingo, or chant that goes with the Kitchener: “Knit purl, purl knit.” This is confusing to some because there is not knitting or purling going on with these stitches. It is referring to inserting the needle into a loop knitwise or purlwise. Let me show you the difference between the two.
This is knitwise:
This is purlwise:
To set up the stitch, thread the darning needle through the bottom needle purlwise, and then through the top needle knitwise. You’re ready to start the “chant” now.
Step 1: Working with the bottom needle, thread the needle through knitwise and slip that stitch off the needle. Then thread the needle through the next stitch purlwise and keep that stitch on the needle.
Step 2: Then moving to the top needle, thread the needle through purlwise and slip that stitch off the needle. Then thread the needle through the next stitch knitwise and keep that stitch on the needle.
Repeat those 2 steps over and over until you’ve reached the end of one side. I highly recommend before starting the next side to go back and fix the tension among any of the stitches you just did. I like to thread my yarn through very loosely and go back and tighten each stitch. I find that’s easier than doing it too tight and trying to go back and loosen them. Once that side looks perfect, flip your work, set up your stitches again on those 2 back needles and work across the other side.
Weave in your ends and you’re done. Now go eat some chocolate. You’ve earned it.
 Jessica says
August 30, 2011 at 2:30 pmWow! This. Is. Beautiful!
 Katy says
August 30, 2011 at 6:35 pmThat is gorgeous! We have no use for snuggly cowls in Hawaii, but I want to make it just cause it is so pretty. Wow!
 Heidi says
August 30, 2011 at 6:37 pmUm, are you selling those on Nerdy Gerdy? And since I’m making a shopping list, what about selling those cute little knitted flowers in a clip form to clip on baby hairbands, purses, or sweaters?
 Mom says
August 30, 2011 at 6:59 pmGreat tutorial! …and beautiful creation!
 www.theevolvinghomemaker.com says
August 30, 2011 at 9:02 pmi lost hope when i saw the addition of needles. scary! lol. i will try this, it is too lovely not too, but maybe in a month or two!
🙂
jen
 Anonymous says
August 31, 2011 at 3:40 amNot only did you provide a wonderful pattern but you also gave us humor; goodness knows we need both thanks so much debi
 Melissa says
August 31, 2011 at 1:06 pmThis just caused me to break out in a cold sweat. I think I’ll just admire yours when I see you this winter.
P.S. You make me laugh.
 Kris says
August 31, 2011 at 8:22 pmJust added to my queue! I’ve never kitchnered in rib before so it will be interesting to try it.
 amy + ryan says
September 2, 2011 at 2:15 pmGretchen! That is just GORGEOUS! I’d love to see it in Nerdy Gerdy, too. 🙂
 ourmoopoints says
September 20, 2011 at 11:35 amI am REALLY wanting to make this… any chance there is a way to START in the round ? I am afraid of the stitches at the end!
 Anonymous says
October 24, 2011 at 11:11 pmI find the Clara Cowl the most unique and would like to knit it for my daughter, but I can’t figure out what C24F means. Can someone help?
 Wendy says
October 31, 2011 at 5:32 pmFrom the pattern:
C24F in rib= place the first 12 stitches onto the crochet hook and hold in front of the work. Work the next 12 stitches in 1×1 rib, then work the stitches off of the crochet hook in 1×1 rib.
Does that help?
Wendy
 pogosplace says
October 31, 2011 at 7:31 pmThank you for such a thorough tutorial. Can’t wait to try it!
 Isla says
December 4, 2011 at 9:41 pmi have just finished knitting one of these for my dad for christmas! it has turned out beautifully in black and white denim yarn. though i have to say that kitchener rib is the most awful thing i ever did knit (or sew)!!
thanks for sharing the pattern!
 soonerptgal says
December 6, 2011 at 6:55 amLove this, but am not doing something right with the C24F/ C24B. Do I hold in Front with right hand & knit needle or do u flip it to hold with left hand & knit needle? Then when working the 12 from the crochet needle, do I work into the right or left knit needle?
New to cable techniques & patterns so any help is greatly appreciated. Thanks!
 Marie says
May 19, 2012 at 7:25 amTrès joli! very nice cowl! I made it with colorful Katia India, and WOW! I made the cables only 3 times, enough for a small very protective cowl! Thank you!
 Anonymous says
December 1, 2013 at 11:13 pmI love this Cowl! Can you Please Please Please help me I am having problems with the pattern. The cowl does not look like a knit one stitch purl one stitch pattern. It looks like a knit one row, purl one row?
Am I reading it wrong?
Where can I go to see how a cable of 12 st is done starting on the 1st stitch, does it get flipped over the 1st 12 stitches that are being held on the crochet needle. I wanted to give everyone one for Christmas lol…..
 Maribel Adams says
December 28, 2013 at 9:09 pmThis is really pretty and looks like it would knit up very fast.
Unfortunately, I have done this a few times today and ripped it out because the 12 stitches in the beginning of the cable pull the bottom of this in a funny way. I’m not sure if it is supposed to look this way or something I am doing wrong.
It seems to be a huge stretch from the beginning across twelve stitches to knit the next twelve.
 Anonymous says
January 31, 2014 at 1:22 amI’m having the same problem as Maribel. I can’t seem to make the c24 work. I’ve taken my work apart several times. I would love to see a quick video on how this is done.
 helina says
February 18, 2014 at 5:18 pmThank you for the pattern, I liked it a lot. I bought a skein of Katia Bolivia and found your Clarra to go really nicely with it. There is a pic on my Ravelry notebook-
 Laura @Suddenexpression says
July 29, 2014 at 2:46 pmThanks for the pattern! I’m just to the Kitchener and I decided instead of buying DPNs just for this I will put the back on stitch holders and then transfer onto my needles when I’m ready to flip. I’ll see if this idea works out. Love the pattern!
 Anonymous says
November 18, 2014 at 3:39 pmI just made this and it came out great! Even my kitchener stitches were acceptable, if not perfect. I slipped every first stitch and used Misti Alpaca Chunky in the light pink. Size 10.5 needles -tried 13 but the stitches were too floppy. A friend has already requested one in the same color! This also works quite well as a 40’s style turban/earwarmer! Thanks so much for the pattern. I’m going to make a few of them for friends. Such a quick knit.
 Protege says
January 22, 2016 at 4:22 pmThankful you didn’t continue on size 13 needles. I just realized my skein of 109 yds Misti Alpaca won’t do the entire 5 repeats of pattern. Hoping 4 will be enough to be comfortable. Either that or I will have to frog and try size 11s. Have had the yarn for years and LOVE this pattern.
 Anonymous says
January 22, 2015 at 9:45 pmThis is such a beautiful pattern and a wonderful way to enjoy one skein of luscious baby alpaca! Thanks so much for sharing. (rdOtter from Ravelry)
 Anne says
September 2, 2015 at 5:41 amCould you just do the Kitchener stitch off of two needles instead of four? Or would the end result not look right?
 Gretchen says
September 2, 2015 at 6:30 pmYou can, but you will see the grafting line, as it will all be in stockinette for that line instead of ribbing. The 4 needles allows you to graft in rib.
 Shelley says
November 29, 2015 at 5:43 amCan this be done using two different colours? If so, would I use one colour for half the stitches and the second colour for the other half…or would the second colour only be introduced in the cable sequence? How would you recommend doing it? Thank you.
 Debbie says
December 1, 2017 at 11:57 amHaving an invisible seam is a dream…I’m going to try this – thanks for sharing!! Can I just confirm – the top two needles are all the knit stitches…once they are done, and you flip it, what were purl stitches become knit stitches (since you flip it), and you just repeat the process. Is that right? And once you finish the top two needles, then you’re done with those needles entirely, right? Sorry for all the questions! I’m just trying to envision what the process will look like.